
Understanding 3-Way Dimmer Switch Basics
Three-way dimmer switches allow you to control a light fixture from two locations. This setup often uses two switches‚ one of which is a dimmer‚ offering adjustable light levels from either switch position. This is different from traditional single pole switches.
What is a 3-Way Switch Circuit?
A 3-way switch circuit is a wiring configuration that enables control of a single light fixture from two different switch locations. Unlike a standard single-pole switch‚ which simply interrupts or completes a circuit‚ a 3-way setup uses two switches with traveler wires connecting them. These traveler wires allow the current to flow through one switch or the other‚ completing the circuit to the light. Both switches have a common terminal‚ a line terminal (power in)‚ and two traveler terminals. A 3-way circuit does not have an on/off state that is set by either switch; the light turns on or off depending on the state of both switches.
Why Use a 3-Way Dimmer?
A 3-way dimmer switch combines the convenience of controlling a light from two locations with the added benefit of adjustable light intensity. This allows you to create the perfect ambiance in a room‚ whether you need bright light for tasks or a soft glow for relaxation. Furthermore‚ dimming lights can also contribute to energy savings and prolong the lifespan of your light bulbs. 3-way dimmer switches can be particularly useful in larger rooms‚ hallways‚ or staircases where you want to control the lighting from multiple entry points and have the flexibility of brightness control. This functionality enhances both comfort and energy efficiency. They are an upgrade from standard 3-way switches by giving the user more control over their light.
Wiring a 3-Way Dimmer Switch
Wiring a 3-way dimmer involves understanding the circuit’s connections‚ typically using traveler wires‚ a common terminal‚ and a load wire. It’s essential to follow safety precautions and the correct wiring diagram for successful installation.
Essential Tools and Safety Precautions
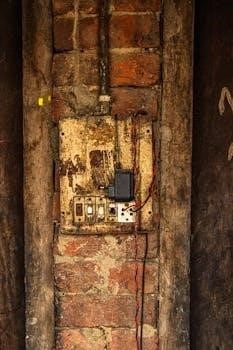
Before commencing any electrical work‚ safety is paramount. Ensure you have essential tools such as a non-contact voltage tester‚ screwdrivers (both Phillips and flathead)‚ wire strippers‚ and possibly pliers. Always turn off the power at the circuit breaker before touching any wires. Double-check with your voltage tester to confirm the power is off at the switch box. It is wise to wear safety glasses. When working with wires‚ ensure proper connections and that no bare wires are exposed‚ using wire nuts to cover connections. If you are unsure about any aspect of the wiring‚ it is best to consult a qualified electrician. Familiarizing yourself with the wiring diagram for your specific dimmer switch is also crucial to avoid errors. Never attempt to work with live wires.
Step-by-Step Wiring Instructions
After ensuring the power is off‚ begin by removing the existing switches‚ noting the wire positions. Identify the common terminal on each switch; this is often a different color screw. Typically‚ one switch will connect to the power source‚ while the other connects to the light fixture. Connect the traveler wires (usually two) to the corresponding terminals on both the dimmer and the standard 3-way switch. The common wire from the power source will connect to the appropriate terminal on the dimmer‚ and the load wire goes to the other switch. Use wire nuts to securely connect wires. Ensure all connections are tight and insulated. Reattach the switches to the box and test by restoring power.

Specific 3-Way Dimmer Considerations
When installing 3-way dimmers‚ consider the type of dimmer‚ especially ELV dimmers‚ which may require neutral wires. Also‚ understand different wiring scenarios‚ such as replacing existing switches or wiring a new circuit‚ which affects connections.
ELV Dimmers and Neutral Wires
Electronic Low Voltage (ELV) dimmers are specifically designed to control low-voltage lighting fixtures‚ often those using transformers. Unlike standard dimmers‚ ELV dimmers frequently employ reverse phase control‚ a method that often necessitates a neutral wire connection within the circuit. This requirement stems from the way ELV dimmers regulate power‚ using MOSFETs. The presence of a neutral wire is crucial for their proper functionality‚ ensuring that the dimmer can accurately and reliably control the light output. Therefore‚ when considering an ELV dimmer for a 3-way setup‚ verifying the availability of a neutral wire in your electrical box is essential. Failure to do so may result in the dimmer not working correctly or even causing damage; Always consult the manufacturer’s specifications and wiring diagrams before installation. This consideration is paramount in the planning phase of a 3-way dimmer project.
Wiring for Different Scenarios
Wiring a 3-way dimmer can vary based on your existing setup‚ requiring careful attention to detail. One common scenario involves replacing a standard 3-way switch with a dimmer‚ where you’ll need to identify the common‚ traveler‚ and load wires. Another situation might be wiring a completely new 3-way circuit‚ demanding a thorough understanding of the power source‚ switch locations‚ and light fixture connections. Furthermore‚ scenarios may involve a single-pole application‚ where the dimmer acts as a traditional on/off switch. In any case‚ consulting the specific wiring diagram provided with your dimmer is crucial. Also‚ it is imperative to note the specific terminals on the switch. Understanding if you need to use the neutral wires is important for a correct wiring. Different types of dimmers may require slightly different connection methods‚ so precise wiring and verification are essential; Always double-check your connections before restoring power.
Advanced Topics and Troubleshooting
Advanced topics include smart 3-way dimmer installations‚ often involving wireless communication and specific wiring needs. Troubleshooting common issues‚ such as flickering lights or non-responsive switches‚ requires careful diagnosis and a systematic approach.
Smart 3-Way Dimmer Installation
Installing smart 3-way dimmers introduces a new level of complexity compared to traditional switches‚ often requiring a neutral wire connection which may not be present in older homes. These devices frequently use wireless protocols like Wi-Fi or Zigbee to allow remote control and integration with smart home systems. The installation process usually involves identifying the load wire‚ traveler wires‚ and the line wire using a voltage tester. It is crucial to follow the manufacturer’s wiring diagram precisely‚ as incorrect connections can lead to malfunction or damage to the device. Furthermore‚ some smart dimmers may require specific apps or hubs for proper setup and operation. Some systems may need the primary switch position to be marked during the installation. The use of smart dimmers offers advanced features like scheduling‚ scene setting‚ and voice control‚ enhancing the functionality and convenience of your lighting system.
Troubleshooting Common Wiring Issues
When installing 3-way dimmer switches‚ several common issues can arise. A frequent problem is the dimmer not working correctly‚ often caused by misidentified wires or loose connections. Incorrectly connecting the load‚ line‚ or traveler wires can result in the light not dimming‚ flickering‚ or not turning on at all. If the dimmer powers on but doesn’t control the light‚ double-check the wiring against the manufacturer’s diagram‚ paying close attention to the common terminal and traveler wires. Another issue is when the dimmer switch works from one location but not the other‚ indicating a problem with the wiring between the two switches. If the light is always on or always off‚ there might be a short circuit or an improperly wired switch; It’s crucial to use a voltage tester to verify power and identify wires accurately before making any connections. Always turn off the power at the breaker before inspecting or adjusting any wiring.
Additional Resources
Wiring diagrams for 3-way dimmer switches can be found online‚ often provided by manufacturers like Lutron and Eaton. These resources can include step-by-step guides and videos for successful installation and troubleshooting.
Where to Find Wiring Diagrams
Locating reliable wiring diagrams for 3-way dimmer switches is crucial for a safe and successful installation. A primary source for these diagrams is the manufacturer’s website of your chosen dimmer switch brand‚ such as Lutron‚ Leviton‚ or Eaton. These sites often have dedicated support sections or product pages where you can download PDF versions of wiring diagrams and installation guides. Online retailers that sell electrical components‚ such as Amazon or Home Depot‚ also sometimes offer downloadable diagrams within the product description or specifications. Furthermore‚ electrical DIY forums and websites often provide user-generated diagrams‚ however‚ it’s essential to verify their accuracy against trusted sources. Remember to always prioritize diagrams directly from the manufacturer to ensure compatibility and adherence to safety standards. Be careful when using online sources that aren’t verified.