char broil the big easy manual

Char Broil The Big Easy Manual: An Overview

The Char-Broil Big Easy manual details oil-less cooking, addressing data type discrepancies and memory models. It covers file handling and object arrays, ensuring safe operation.

Understanding the Big Easy Oil-less Turkey Fryer

The Char-Broil Big Easy represents a departure from traditional turkey frying, eliminating the need for potentially hazardous oil. Understanding its operation requires grasping fundamental programming concepts like data types – mirroring how a ‘char’ variable holds a single byte. Like checking file access, ensuring proper assembly is crucial. The system utilizes a burner assembly and precise temperature control, akin to managing object arrays in C++.

It’s a system where each component, like a character in a string, plays a vital role in the overall process, demanding careful attention to detail for optimal results.

Key Features and Components

The Big Easy features a burner assembly, cooking basket, and control panel. These components, like data structures, work together for efficient, safe, and flavorful cooking.

Heating Element and Burner Assembly

The heart of the Big Easy lies within its heating element and burner assembly. This system efficiently converts propane into heat, crucial for oil-less infrared cooking. Like managing data types in programming, precise control is essential. The assembly’s design ensures even heat distribution, mirroring the importance of correct memory addressing.

Proper function relies on a clean burner, avoiding issues similar to errors caused by mismatched data types. Regular inspection and cleaning, as with file handling checks, are vital for optimal performance and longevity. This assembly is a key component, demanding careful attention.

Cooking Basket and Lifting Hook

The Big Easy’s cooking basket, paired with its lifting hook, facilitates safe and easy food handling. Similar to accessing elements within an object array, the hook provides controlled movement. The basket’s design ensures even cooking, akin to efficient code execution. It’s crucial to ensure the basket is securely attached before lifting, preventing accidents.

Regular cleaning of the basket, like verifying file openings, is essential for hygiene and performance. The lifting hook’s integrity should also be checked, mirroring the importance of data type validation. Proper use guarantees successful cooking results.

Control Panel and Settings

The Big Easy’s control panel offers intuitive settings for temperature and timer adjustments, much like defining variables in C programming. Understanding these settings is key to optimal performance. The panel’s functionality relies on accurate data input, similar to validating file access. Precise temperature control ensures even cooking, mirroring efficient code execution.

Familiarize yourself with each setting before operation, akin to understanding data types. Regularly check the panel’s responsiveness, ensuring proper functionality. Correct settings are vital for safe and delicious results, just as proper checks are vital for robust programs.

Setting Up Your Big Easy

Initial setup involves careful assembly, propane tank connection, and crucial leak testing – mirroring the importance of data validation in programming environments.

Initial Assembly Instructions

Carefully unpack all components, verifying against the parts list. Begin by attaching the legs to the base, ensuring secure fastening – akin to establishing a stable data structure. Next, assemble the burner assembly, paying close attention to proper alignment, much like precise code formatting. Connect the drip tray and ensure the cooking basket moves freely on the lifting hook. Remember, a solid foundation, whether in grilling or programming, is paramount for success. Double-check all connections before proceeding, mirroring thorough code review practices.

Propane Tank Connection

Connect a standard 20lb propane tank, ensuring the valve is tightly secured to the regulator. Verify the connection – similar to checking data type compatibility – to prevent leaks. Slowly open the tank valve, observing the pressure gauge. A proper seal is crucial, mirroring secure file handling protocols. Never attempt to connect a damaged tank or regulator. Treat propane with respect, as mishandling can lead to errors, just like faulty code. Always perform a leak test after connection, prioritizing safety above all else.

Leak Testing Procedures

After connecting the propane tank, perform a leak test. Mix soapy water and apply it to the hose and regulator connections – akin to debugging code for errors. Open the propane tank valve slightly. Bubbles indicate a leak, similar to identifying data type mismatches. If leaks are detected, immediately close the valve, tighten connections, and retest. Never use a flame to check for leaks; this is extremely dangerous. A secure connection, like a properly structured array, is vital for safe operation.

Operating Instructions

Follow the manual’s steps for preheating, loading, and cooking, mirroring file handling checks. Precise timing and temperature control, like data validation, are crucial.

Preheating the Unit

Before cooking, proper preheating is essential for optimal performance. Ensure the propane tank is securely connected, referencing the manual’s connection instructions. Initiate ignition following the outlined procedures, verifying a consistent flame. Allow the unit to preheat for approximately 15-20 minutes, reaching the desired temperature.

This preheating phase, similar to file opening checks, establishes a stable cooking environment. Monitor the control panel, ensuring the temperature gauge indicates readiness. A fully preheated unit guarantees even cooking and efficient operation, mirroring the importance of correct data types.

Loading the Cooking Basket

Carefully load food into the cooking basket, ensuring it isn’t overcrowded to allow for proper heat circulation – akin to managing object arrays. Distribute the food evenly for uniform cooking, preventing uneven results. Securely attach the lifting hook to the basket handle before lowering it into the unit.

Lower the basket slowly and steadily, mirroring careful file handling procedures. Avoid sudden movements. Remember, like addressing data type errors, proper loading is crucial for successful outcomes. Always double-check the basket is fully seated before initiating the cooking process.

Cooking Times and Temperatures

Refer to the manual’s charts for precise cooking times and temperatures, varying by food type and weight – similar to checking file opening procedures. Generally, poultry requires around 30-45 minutes per pound. Always use a meat thermometer to verify internal temperature, ensuring safety.

Consistent temperature control, like managing data types, is vital. Avoid opening the lid frequently, as this extends cooking time. Remember, proper timing and temperature are key, mirroring the precision needed when working with character variables and memory models.

Safety Precautions

The manual emphasizes outdoor use only, proper grounding, and oil-less cooking safety – akin to verifying file access and managing data types correctly for secure operation.

Outdoor Use Only

Crucially, the Char-Broil Big Easy is designed for outdoor use exclusively. Operating it indoors presents a significant fire hazard and risks carbon monoxide poisoning. Ensure ample ventilation and keep the unit away from combustible materials like decks, patios, or overhanging structures. The manual stresses this repeatedly, mirroring the importance of correct data handling – a single error, like an incorrect type assignment, can cause system failure. Just as verifying file access prevents crashes, outdoor operation prevents dangerous incidents. Always prioritize a safe, open environment during operation.

Proper Grounding Techniques

The Char-Broil Big Easy manual doesn’t explicitly detail grounding, but safe propane appliance operation implicitly requires it. Similar to how a char variable holds numerical representations of characters, a properly functioning gas system relies on a complete circuit. Ensure the propane tank connection is secure and leak-free – akin to verifying data types before storage. While not a direct electrical grounding concern, a stable, level surface prevents tipping, mirroring the stability needed in memory allocation. Prioritize safety checks before each use, just as you’d validate code.

Oil-less Cooking Safety

The Char-Broil Big Easy’s oil-less design significantly reduces risks compared to traditional frying. However, the manual stresses outdoor use only – akin to ensuring correct data types in programming to avoid errors. Hot surfaces pose burn hazards; treat them like potential overflow issues in code. Never leave the unit unattended during operation. Proper loading of the cooking basket is crucial for even heating, mirroring efficient memory allocation. Regularly inspect the burner assembly, similar to debugging code, to maintain optimal performance and safety.

Cleaning and Maintenance

Regular cleaning, like verifying file openings, ensures longevity. Inspect the burner assembly and basket frequently, mirroring code debugging for optimal performance.

Cleaning the Burner Assembly

To clean the burner assembly, ensure the unit is completely cool and the propane tank is disconnected. Carefully remove the burner assembly following the manual’s instructions. Inspect the burner ports for any blockages – similar to checking data types in code. Use a wire brush or small cleaning tool to clear any obstructions, guaranteeing even heat distribution.

Pay attention to potential corrosion, much like debugging errors. Reinstall the burner assembly securely, verifying proper alignment. A clean burner ensures efficient operation and prevents uneven cooking, mirroring a well-structured program’s performance. Regular cleaning extends the lifespan of your Big Easy.

Cleaning the Cooking Basket

Cleaning the cooking basket is crucial after each use. Allow the basket to cool completely before handling. Remove any food residue with warm, soapy water and a non-abrasive sponge – akin to careful data handling. Stubborn residue may require soaking. Inspect the basket for any damage, similar to checking for file access errors.

Ensure all soap is rinsed thoroughly to avoid affecting food flavor. Dry the basket completely before storing, preventing corrosion. A clean basket guarantees hygienic cooking and optimal performance, much like a well-maintained array of objects.

Storage Instructions

Proper storage extends the life of your Big Easy. Ensure the unit is completely cool and dry before storing, preventing corrosion – mirroring careful file handling. Store indoors in a dry, covered location, shielded from the elements. Disconnect the propane tank and store it separately in a well-ventilated area, adhering to safety guidelines.

Protect the burner assembly and cooking basket from damage, like safeguarding objects in an array. Covering the unit helps prevent dust and debris accumulation, ensuring it’s ready for its next use, much like a prepared code base.

Troubleshooting Common Issues

Addressing problems like uneven cooking or ignition failures requires checking connections and ensuring proper operation, similar to debugging code for errors.

Uneven Cooking

If your food isn’t cooking evenly with the Big Easy, several factors could be at play. Ensure the cooking basket isn’t overloaded, as overcrowding restricts heat circulation. Verify the burner assembly is clean and functioning correctly; obstructions can cause inconsistent heating.

Like debugging code, check for data inconsistencies – ensure the food is positioned correctly within the basket for uniform exposure. Also, consider external elements like wind, which can create temperature fluctuations. Consistent monitoring and adjustments are key, mirroring iterative programming practices.

Ignition Problems

Experiencing difficulty igniting your Big Easy? First, confirm the propane tank is adequately filled and properly connected. Inspect the burner assembly for any debris or obstructions that might hinder ignition, similar to checking for errors in code. Ensure the igniter is clean and dry; moisture can prevent a spark.

If issues persist, try manually lighting the burner following the manual’s instructions. Like file handling checks, verify the gas line isn’t kinked. A faulty igniter may require replacement, mirroring hardware troubleshooting.

Temperature Control Issues

Inconsistent temperatures with your Big Easy? Verify the unit is positioned away from strong winds, which can affect burner performance. Ensure the lid is securely closed; proper sealing is crucial for heat retention, akin to data type integrity. Check for obstructions around the burner assembly that might disrupt airflow.

If the control panel displays inaccurate readings, consult the manual for calibration procedures. A malfunctioning temperature sensor may necessitate replacement, similar to debugging code errors.

Recipes and Cooking Ideas

Explore diverse recipes! From succulent turkeys to flavorful chicken and seafood, the manual unlocks culinary possibilities, mirroring efficient code for varied outputs.

Turkey Recipes

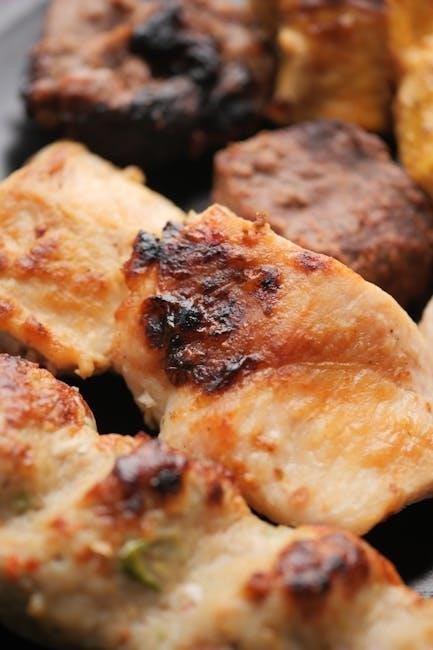
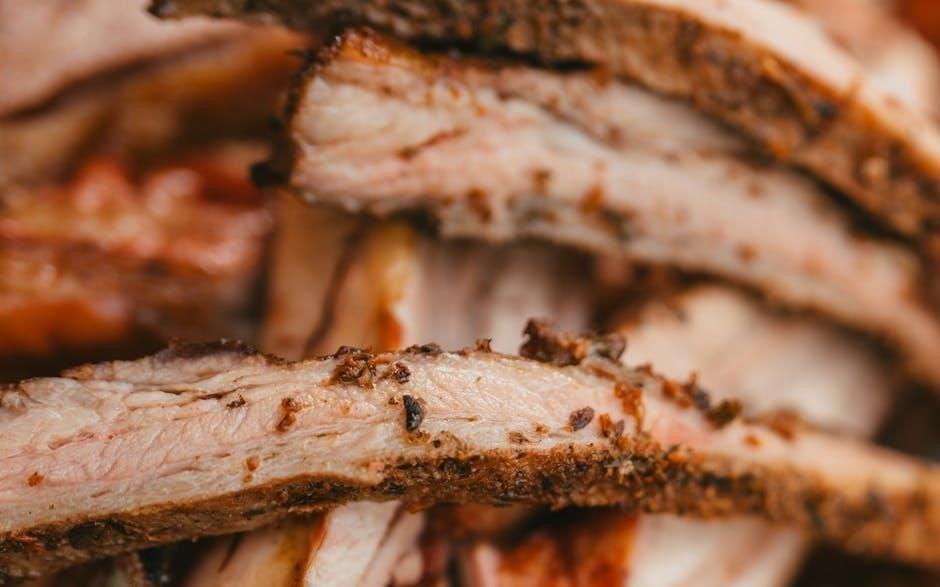
Unlock juicy, flavorful turkey with the Big Easy! The manual guides you through various preparations, ensuring even cooking – akin to debugging code for optimal results. Discover recipes for classic roasted turkey, Cajun-spiced birds, and even smoked variations. Proper preheating and temperature control, detailed within, are crucial, much like data type management in programming. Explore brining techniques for enhanced moisture and seasoning blends for unforgettable taste. The Big Easy delivers consistently delicious turkey, simplifying a traditionally complex cooking process, mirroring efficient code execution.

Chicken and Seafood Recipes

Beyond turkey, the Big Easy excels with chicken and seafood! The manual provides recipes for perfectly cooked chicken – whole, spatchcocked, or individual pieces. Explore diverse marinades and rubs, mirroring careful data input. Discover succulent shrimp boils, flavorful fish fillets, and even lobster preparations. Consistent temperature control, like robust error checking, ensures safe and delicious results. The oil-less method delivers healthier options without sacrificing taste. Mastering these recipes requires understanding the unit’s capabilities, similar to grasping memory models for optimal performance.

Side Dish Suggestions

Complement your Big Easy feast with delightful sides! The manual doesn’t directly offer these, but consider pairings that enhance the oil-less cooking experience. Roasted vegetables – potatoes, carrots, Brussels sprouts – benefit from the consistent heat. Quick-cooking rice pilafs or couscous provide a fluffy base. Don’t forget classic accompaniments like coleslaw or cornbread. Like efficient code, well-chosen sides complete the meal. Remember proper file handling – prepare sides while the main course cooks for seamless serving, mirroring structured programming principles.

Warranty Information

The Big Easy’s warranty covers defects in materials and workmanship. Claim procedures require proof of purchase; details are within the manual for efficient resolution.

Warranty Coverage Details

Char-Broil’s warranty for the Big Easy typically covers defects in manufacturing and materials for a specified period, often one or two years from the original purchase date. This coverage extends to the burner assembly, cooking basket, and control panel, protecting against malfunctions under normal use.

However, the warranty generally doesn’t cover damage resulting from misuse, improper maintenance (like failing to clean the burner), accidents, or natural disasters. Proof of purchase is crucial for any claim, and modifications to the unit void the warranty. Refer to the complete manual for precise terms and conditions.

Claim Procedures

To initiate a warranty claim for your Char-Broil Big Easy, first, locate your original purchase receipt as proof of date. Contact Char-Broil’s customer service department – details are within the manual – and describe the defect clearly. You may need to provide photos or videos demonstrating the issue.

Char-Broil will likely request you return the defective part(s) for inspection. If the claim is approved, they’ll either repair or replace the component, at their discretion. Shipping costs may apply, and the process can take several weeks.

Technical Specifications

The Big Easy’s specifications include dimensions, weight, propane consumption rates, and maximum cooking capacity – crucial details for optimal performance and safe operation.

Dimensions and Weight

Understanding the physical characteristics of the Char-Broil Big Easy is vital for placement and portability. While specific dimensions vary slightly between models, expect a substantial unit designed for outdoor use. The overall height typically ranges from 37 to 40 inches, with a width and depth around 26-28 inches.

Weight is a significant factor, generally falling between 40 and 50 pounds when fully assembled. This weight necessitates a stable, level surface for operation. Considering these dimensions and weight constraints ensures safe and efficient use of your Big Easy oil-less turkey fryer.

Propane Consumption Rate

Efficient propane usage is key to maximizing cooking time with the Char-Broil Big Easy. The unit typically operates at a consumption rate of approximately 0.8 to 1.0 pounds of propane per hour during standard cooking operations. This rate can fluctuate based on ambient temperature and preheating duration.

Monitoring propane levels is crucial for uninterrupted cooking. A standard 20-pound propane tank can provide roughly 20-25 hours of operation. Understanding this consumption rate allows for proper planning and ensures you have sufficient fuel for extended cooking sessions;

Maximum Cooking Capacity

The Char-Broil Big Easy is designed to handle substantial food quantities, making it ideal for gatherings. The cooking basket typically accommodates a turkey up to 18 pounds. For chickens, you can comfortably roast up to three 6-pound birds simultaneously.

Seafood capacity is also generous, allowing for several pounds of fish or shrimp to be cooked at once. However, avoid overcrowding the basket to ensure even cooking and optimal heat circulation. Exceeding the recommended weight limits may impact performance.

saalt cup instructions

Saalt Cup Instructions: A Comprehensive Guide

Welcome to a detailed exploration of the Saalt menstrual cup! This guide provides essential instructions for comfortable, leak-free periods, covering everything from initial preparation
to long-term care and maintenance, ensuring a positive experience with your reusable cup.

Understanding the Saalt Cup

The Saalt menstrual cup represents a modern, sustainable approach to period care. Unlike traditional disposable products, the Saalt cup is reusable, offering both environmental and economic benefits. Crafted in the USA from medical-grade silicone, it’s designed for comfortable, leak-free protection for up to 12 hours.

This innovative cup is worn internally, similar to a tampon, but collects menstrual flow rather than absorbing it. This collection minimizes dryness and discomfort, while also reducing the frequency of changes needed. Saalt cups are vegan and cruelty-free, reflecting a commitment to ethical practices. They are also BPA and latex-free, making them suitable for individuals with sensitivities.

Understanding the cup’s design and material is crucial for proper use and care, ensuring a positive and confident experience throughout your menstrual cycle. The Saalt cup is FDA registered, guaranteeing its safety and quality.

What is a Saalt Menstrual Cup?

A Saalt menstrual cup is a reusable feminine hygiene product crafted from soft, medical-grade silicone. It’s designed as an alternative to tampons and pads, offering a comfortable and eco-friendly way to manage your period. Instead of absorbing menstrual fluid, the cup collects it, providing up to 12 hours of protection, depending on your flow.

The cup is inserted into the vagina and forms a seal to prevent leaks. Because it’s reusable, a single Saalt cup can last for several years with proper care, significantly reducing waste compared to disposable products. Saalt cups are available in different sizes to accommodate varying anatomies and flow levels.

They are a convenient and cost-effective solution, especially for those seeking a more sustainable and body-friendly period experience. Saalt prioritizes quality and safety, with FDA registration and a commitment to vegan and cruelty-free practices.

Saalt Cup Sizes: Choosing the Right Fit

Selecting the correct Saalt cup size is crucial for comfort and leak prevention. Saalt primarily offers two sizes: Small and Regular. The Small size is generally recommended for individuals under 30 years old who have not given birth vaginally, or those with a lighter flow.

The Regular size is typically suitable for those over 30, or anyone who has experienced vaginal childbirth, regardless of age. It’s also a good choice for individuals with a heavier menstrual flow. However, these are merely guidelines; pelvic floor strength and personal preference play significant roles.

Consider your anatomy and flow when making your decision. If you’re unsure, starting with the smaller size is often recommended. A properly fitted cup should create a secure seal without causing discomfort or pressure.

Materials and Safety

Saalt menstrual cups are crafted from 100% medical-grade silicone, ensuring biocompatibility and safety for internal use. This material is non-toxic, hypoallergenic, and free from harmful chemicals like BPA, latex, and phthalates. The silicone is manufactured in the USA and is FDA registered, adhering to stringent quality control standards.

Saalt cups are also vegan and cruelty-free, reflecting a commitment to ethical production practices. Medical-grade silicone is durable and resistant to degradation, allowing for years of reliable use with proper care. The cups are designed to be gentle on sensitive tissues, minimizing irritation.

While generally safe, it’s essential to maintain cleanliness and follow sanitization instructions to prevent potential infections. Always inspect your cup for any signs of damage before each use.

Preparing Your Saalt Cup

Before experiencing the benefits of your Saalt cup, proper preparation is key! This involves thorough sanitization to ensure hygiene and a comfortable, worry-free menstrual experience.

Sanitizing Before First Use

Prior to your very first use, it’s absolutely crucial to thoroughly sanitize your Saalt menstrual cup to guarantee optimal hygiene and peace of mind. The cup arrives brand new, and sanitizing removes any potential residue from the manufacturing process. Several effective methods are available to achieve this essential step.

Boiling is a popular and reliable option: Simply place your clean Saalt cup in a pot of boiling water for 5-10 minutes, ensuring it’s fully submerged and doesn’t touch the bottom of the pot. Allow it to cool completely before handling. Alternatively, you can wipe the cup down with 70 isopropyl alcohol, ensuring complete coverage.

For a convenient solution, consider utilizing the Saalt Steamer or Saalt Compact sterilizer, designed specifically for menstrual cup care. These offer a quick and efficient sanitization process. Remember to always check the cup for any damage before and after sanitizing.

Sanitizing Between Periods

Maintaining proper hygiene between menstrual cycles is vital for the longevity and safe use of your Saalt menstrual cup. While not as intensive as the initial sanitization, regular cleaning prevents bacterial buildup and ensures the cup remains fresh for your next period.

Sanitizing before storing your cup after each cycle is highly recommended. You can choose from several methods, mirroring those used for the first-time sanitization. Boiling for 5-10 minutes remains a highly effective option, followed by allowing the cup to cool completely. Alternatively, wiping with 70 isopropyl alcohol provides a quick and convenient solution.

The Saalt Steamer or Compact sterilizer offer a dedicated and efficient way to sanitize, especially for those seeking a streamlined process. Proper storage, detailed in the care section, complements sanitization, keeping your cup clean and ready for use.

Cleaning During Your Period

Maintaining cleanliness during your period is crucial for comfort and preventing odors. After each removal, thoroughly rinse your Saalt cup with cool water to remove any menstrual fluid. Avoid using scented soaps or harsh detergents, as these can disrupt your vaginal pH balance and potentially damage the silicone.

If you don’t have immediate access to a sink, consider using a water bottle or a clean container filled with water for a preliminary rinse. This is particularly helpful when in public restrooms. A thorough wash with mild, unscented soap and water should follow as soon as possible.

Ensure all traces of fluid are removed before reinserting the cup. Inspect the small air holes near the rim, ensuring they are clear of any blockages. Regular cleaning throughout the day contributes to a comfortable and hygienic menstrual experience.

Folding Techniques

Mastering different folds is key to comfortable insertion! Explore the C-fold, 7-fold, and punch-down methods to discover which best suits your body and preferences.

The C-Fold Method

The C-fold is often recommended for beginners due to its simplicity and ease of use. To achieve this fold, begin by holding the Saalt cup in one hand. Gently press the sides of the rim together, folding the cup in half to create a “C” shape. Ensure the fold is secure, but not overly tight, as this can make insertion more difficult.

Pinch the base of the “C” to maintain the fold during insertion. This method creates a smaller profile, making it easier to insert, similar to a tampon. It’s a reliable technique for achieving a secure and comfortable fit. Many users find the C-fold provides excellent opening once inside, leading to a leak-free experience. Experiment with slightly different pressures when folding to find what works best for your body and cup.

Remember to relax your muscles during insertion for optimal comfort and success!

The 7-Fold Method

The 7-Fold is another popular technique, known for creating a very narrow insertion point. Begin by flattening the Saalt cup in your hand. Then, fold the rim down and across the body of the cup, forming a “7” shape. Specifically, fold the top right corner of the rim across to the opposite side. Continue folding until a distinct “7” is visible.

Pinch the base of the fold to keep the cup compressed during insertion. This method results in a very small insertion profile, which can be beneficial for those with a lower cervix or experiencing difficulty with other folds. It requires a bit more practice than the C-fold, but many users find it provides a very secure and comfortable fit once mastered.

Ensure the fold remains secure until fully inserted, and allow the cup to open naturally.

The Punch-Down Fold

The Punch-Down Fold is a straightforward method, especially good for beginners seeking a simple insertion technique. Begin by holding the Saalt cup with the rim facing you. Use your index finger to press down on one side of the rim, collapsing it inwards towards the base of the cup. Simultaneously, pinch the base to maintain the compressed shape.

This creates a triangular or slightly flattened shape, making insertion easier. It’s important to ensure the fold remains secure during insertion to prevent discomfort or leakage. This fold doesn’t require as much precision as some others, making it a great starting point for those new to menstrual cups.

Once inserted, release the pinch and allow the cup to pop open fully. Practice makes perfect with this method!

Insertion

Achieving a comfortable and secure insertion is key to a leak-free experience with your Saalt cup; finding the right position and utilizing lubrication are vital steps.

Finding a Comfortable Position

Experimenting with different positions is crucial for a successful Saalt cup insertion. Many users find success squatting, as this naturally shortens and relaxes the vaginal canal, making insertion easier. Alternatively, you can try sitting on the toilet with your knees apart, or even standing with one leg elevated on the toilet seat or another stable surface.

The goal is to find a position that allows for maximum relaxation of your pelvic floor muscles. Tension can make insertion more difficult and uncomfortable. Don’t hesitate to try several positions until you discover what works best for your body. Remember to take deep breaths and focus on relaxing your muscles throughout the process. A relaxed body will significantly improve your experience and help ensure proper placement of the cup, leading to a leak-free period.

Using Water as Lubricant

Inserting your Saalt Cup is often smoother when aided by a water-based lubricant. Unlike some other menstrual cups, Saalt recommends using water as a natural and readily available option. Simply wet the rim of the folded cup with clean water before insertion. This reduces friction and allows for a more comfortable glide into the vaginal canal.

Avoid using petroleum-based lubricants, oils, or silicone-based lubricants, as these can damage the medical-grade silicone of your Saalt cup over time, potentially shortening its lifespan. Plain water is the safest and most effective choice. If you experience any dryness or discomfort, adding a small amount of water to the cup’s rim can make a significant difference. Remember to gently rotate the cup as you insert it to further aid in smooth placement and ensure a secure seal.

Troubleshooting Insertion Difficulties

If you encounter resistance during insertion, don’t force it! This is a common experience, especially when first learning to use a menstrual cup. Take a deep breath and relax your pelvic floor muscles – tension can make insertion more challenging. Ensure the cup is adequately folded; experiment with different folds like the C-fold or 7-fold to find what works best for you.

Re-wetting the rim with water can also help. If you’re still struggling, try shifting your position. Squatting, placing one leg on a raised surface, or gently bearing down can open the vaginal canal. If the cup feels stuck, gently rotate it while applying slight outward pressure. Never use excessive force. Patience is key; it may take several attempts to achieve a comfortable and secure insertion.

Removal

Removing your Saalt Cup requires a gentle approach! Breaking the seal and carefully emptying the contents are key steps for a clean and comfortable removal process.

Breaking the Seal

Successfully removing your Saalt Cup begins with breaking the seal, which creates a slight vacuum. Avoid simply pulling directly, as this can be uncomfortable. Instead, gently bear down as if you’re trying to have a bowel movement; this relaxes the pelvic floor muscles and lowers the cup.

Next, insert a finger alongside the cup to gently release the suction. You can gently pinch the base of the cup to further break the seal, making removal easier and more comfortable. Avoid using your fingernails to pinch, as this could damage the silicone.

Once the seal is broken, the cup should move downwards and become easier to grasp. Maintain a relaxed posture throughout the process to minimize any discomfort. Remember, patience is key – don’t force it! If you’re having trouble, try repeating the process of bearing down and gently releasing the seal.

Emptying and Rinsing

Once removed, carefully empty the contents of your Saalt Cup into the toilet. Avoid pouring directly, as this can splash. Then, thoroughly rinse the cup under cool, running water. Warm water can potentially cause staining over time, so cool water is preferred for initial rinsing.

Ensure you rinse all crevices, paying attention to the air holes near the rim, as these can sometimes become blocked. You can use a mild, unscented soap specifically designed for menstrual cups if desired, but it’s often not necessary with regular rinsing.

Inspect the cup for any damage or discoloration. After rinsing, before reinsertion, ensure your hands are clean. Proper emptying and rinsing are crucial for maintaining hygiene and extending the life of your Saalt Cup.

Dealing with Removal Challenges

If you experience difficulty removing your Saalt Cup, try to relax – tension can tighten your muscles, making removal harder. Bear down gently, as if you’re having a bowel movement; this can help lower the cup; Avoid pulling directly on the stem, as this can cause discomfort.

Instead, gently rotate the cup while pulling downwards. If it remains stuck, try gently squeezing the base of the cup to break the seal. Using water as a lubricant can also help.

If you’re still struggling, take a break and try again later. Never force removal. Persistent difficulty could indicate an incorrect insertion depth or angle. If issues continue, consult a healthcare professional for guidance.

Care and Maintenance

Proper care extends your Saalt Cup’s life! Store it in the provided bag, avoid harsh chemicals, and regularly sanitize to maintain hygiene and ensure lasting performance.

Storage Guidelines

Maintaining proper storage is crucial for the longevity and hygiene of your Saalt Cup. When not in use, especially during your period, it’s essential to store your cup correctly to prevent damage and maintain its cleanliness;

The Saalt Cup comes with a breathable carry bag specifically designed for storage. This bag allows air circulation, preventing the build-up of moisture which can potentially lead to bacterial growth. Always ensure the cup is completely dry before storing it in the bag.

Avoid storing your cup in airtight containers, as this can trap moisture. Do not store it with other items that could potentially cause damage, such as sharp objects or items containing fragrances. Keep the cup in a cool, dry place away from direct sunlight and extreme temperatures.

Between periods, or after sanitizing, ensure the cup is thoroughly dry before placing it in its storage bag. This simple step significantly contributes to maintaining a hygienic and long-lasting menstrual cup.

Extending the Life of Your Cup

Proper care significantly extends the lifespan of your Saalt menstrual cup, allowing you to enjoy its benefits for years. While medical-grade silicone is durable, mindful handling is key to preventing damage and maintaining its integrity.

Avoid using harsh chemicals or abrasive cleaners, as these can degrade the silicone over time. Steer clear of scented soaps, oils, or lotions when cleaning your cup. Regular, gentle cleaning with a dedicated menstrual cup wash is ideal. Inspect your cup regularly for any signs of damage, such as tears or punctures.

Avoid exposing your cup to extreme temperatures for prolonged periods. While boiling is a sanitization method, ensure it’s done briefly and avoid letting the cup touch the bottom of the pot. Proper storage in the provided breathable bag also contributes to longevity.

By following these guidelines, you can maximize the lifespan of your Saalt Cup, making it a sustainable and cost-effective period solution.

Traveling with Your Saalt Cup

Traveling with your Saalt menstrual cup is convenient and worry-free! The compact design and reusable nature make it an ideal travel companion, eliminating the need to pack numerous disposable products. Always ensure your cup is thoroughly cleaned and sanitized before your trip.

Carry your cup in its provided storage bag to protect it from damage and maintain hygiene. Consider bringing a dedicated menstrual cup wash for cleaning while on the go, especially if access to clean water is limited. If boiling isn’t feasible, 70% isopropyl alcohol can be used for sanitization.

Familiarize yourself with bathroom facilities at your destination. Having a water source nearby is helpful for rinsing. Don’t hesitate to practice insertion and removal before your trip to boost confidence. Pack an extra cup if you’re traveling for an extended period or anticipate difficulties finding cleaning supplies.

With a little preparation, your Saalt Cup can seamlessly integrate into your travel adventures!

shadow raikou raid guide

Shadow Raikou Raid Guide: A Comprehensive Strategy (April 14, 2026)

Today marks the beginning of Shadow Raikou raids in Pokémon GO! This guide provides a detailed strategy, focusing on weaknesses, counters, and tactics
for a successful raid experience. Prepare to challenge this formidable Shadow Pokémon and maximize your chances of victory with this comprehensive resource.

Shadow Raikou has arrived as the latest formidable challenge in Pokémon GO’s Shadow Raid series, demanding strategic team compositions and coordinated efforts from trainers. Unlike standard raids, Shadow Raids present a heightened difficulty due to the Shadow Pokémon’s increased attack power and aggressive move patterns. This event marks Raikou’s debut in its Shadow form, completing the Legendary Dog Trio’s descent into darkness.

These raids are designed for multiple players, though determined duos, potentially aided by Gems, can attempt them. Success hinges on exploiting Raikou’s weaknesses and utilizing powerful counters. The current raid season lacks the Friendship damage bonus, making duo raids significantly harder. This guide will equip you with the knowledge to navigate these challenges, understand the raid mechanics, and ultimately, emerge victorious against Shadow Raikou. Prepare for an intense battle!

Shadow Raikou: Overview and Difficulty

Shadow Raikou, an Electric-type Legendary Pokémon, possesses a menacing presence and amplified power compared to its regular counterpart; As a Shadow Pokémon, it benefits from a significant attack boost, making it a truly challenging raid boss. Its fast-paced attacks and high damage output require trainers to be well-prepared with optimal counters and strategic play.

The difficulty of this raid is considered high, leaning towards very difficult. Duo raids are feasible, but will likely necessitate Gem usage to overcome the increased damage output. Soloing is generally considered impractical for most players. The absence of a Friendship bonus further elevates the challenge. Trainers should anticipate a lengthy battle, even with a strong team of counters. Success demands efficient dodging and consistent damage dealing.

Shadow Raikou’s Weaknesses and Resistances

Shadow Raikou, as an Electric-type Pokémon, exhibits specific weaknesses and resistances that are crucial for raid strategy. It is particularly vulnerable to Ground-type attacks, taking significantly increased damage. Ice-type moves are also super effective, offering a strong offensive advantage. Understanding these weaknesses is paramount for assembling an effective raid team.

Conversely, Shadow Raikou boasts considerable resistance to Flying, Steel, and Electric-type attacks, mitigating a large portion of incoming damage. It is completely immune to Ground-type damage when utilizing its ability. Trainers should avoid using these attack types, as they will prove largely ineffective. Prioritizing counters that exploit its weaknesses while avoiding its resistances is key to a swift and successful raid.

Optimal Weather Conditions for Raiding

Weather boosts significantly impact raid battles, and understanding the optimal conditions for facing Shadow Raikou is vital. Sunny weather is exceptionally favorable, boosting the damage output of Fire, Grass, and Ground-type attacks – aligning perfectly with effective Raikou counters. This boost translates to faster raid completion times and reduced strain on your team.

Conversely, Foggy weather negatively impacts Electric-type Pokémon, reducing the effectiveness of Shadow Raikou’s attacks. While this doesn’t directly benefit your team’s damage, it can prolong the battle. Rainy or Snowy weather offers no significant advantage or disadvantage in this specific raid. Prioritizing raids during Sunny weather will maximize your team’s damage potential and increase your chances of success against this challenging Shadow Pokémon.

Top Tier Shadow Raikou Counters

Determining the top-tier counters for Shadow Raikou is crucial for a swift victory. Based on current data and Pokebattler.com analysis, Mega Houndoom consistently ranks as a premier choice, boasting exceptional DPS and TDO. Following closely are powerful Shadow and non-Shadow variants of Ground-type Pokémon like Groudon and Excadrill.

Ice-type attackers such as Kyurem and Mamoswine also deliver substantial damage. However, remember that Raikou’s resistance to Flying-type attacks means Pokémon with dual Ice/Flying typings are less effective. Prioritize Pokémon with high DPS and a moveset optimized for consistent damage output. Building a diverse team with these top counters will significantly increase your chances of defeating Shadow Raikou efficiently.

Ice-Type Counters: Maximizing Damage

Ice-type Pokémon offer a significant advantage against Shadow Raikou, exploiting its key weakness. Kyurem stands out as a top performer, delivering high DPS when equipped with Ice Beam as its charged attack. Mamoswine, with Ice Shard and Avalanche, is another excellent choice, providing consistent damage output.

However, maximizing damage requires careful consideration of movesets. Glacial Lancer on Kyurem further boosts performance. While Articuno and Lapras are viable options, their lower stats mean they won’t contribute as much DPS as Kyurem or Mamoswine. Remember to power up your Ice-type counters and prioritize those with optimal IVs for the best possible raid performance.

Ground-Type Counters: Effective Alternatives

Ground-type Pokémon present a solid alternative when Ice-type options are limited, offering respectable damage against Shadow Raikou. Groudon, a legendary Pokémon, is a premier choice, excelling with Mud Shot and Earthquake. Excadrill, boasting high attack stats, performs admirably with Mud-Slap and Drill Run, providing swift damage.

Landorus (Therian Forme) is also a strong contender, though its availability may be restricted. While not as potent as Ice-type counters, these Ground-type Pokémon offer a reliable strategy. Prioritize Pokémon with high attack stats and appropriate movesets to maximize their effectiveness during the raid. Remember to consider weather boosts for further damage amplification.

Dragon-Type Counters: Niche but Powerful

Dragon-type Pokémon represent a more niche, yet surprisingly powerful, counter option against Shadow Raikou. While not benefiting from a double resistance like Ice-types, strong Dragon attackers can still inflict significant damage. Rayquaza, with its immense attack stat and access to Dragon Tail and Outrage, stands out as a top choice.

Dialga and Palkia, though slightly less effective than Rayquaza, also provide substantial damage output. Utilizing Dragon Breath and Draco Meteor is crucial for maximizing their potential. Remember that Shadow Raikou’s electric typing reduces the effectiveness of Dragon moves, so strategic deployment is key. These Pokémon are best utilized when other counter types are unavailable or to diversify your raid team.

Detailed Counter Analysis (Based on Pokebattler.com)

Pokebattler.com provides invaluable data for optimizing your raid team against Shadow Raikou. Analysis reveals that Mega Abomasnow consistently ranks as a top performer, boasting exceptional DPS and TDO. Following closely are Shadow Mamoswine and Ice-type legendaries like Kyurem. These counters excel due to Raikou’s vulnerability to Ice.

However, Pokebattler also highlights the effectiveness of Shadow Weavile and Glaceon, offering accessible alternatives for players lacking Mega or legendary Pokémon. The site’s simulations demonstrate that faster-charging movesets, even with slightly lower DPS, can significantly reduce raid times. Examining faint counts is crucial; prioritizing Pokémon that can withstand multiple attacks maximizes team efficiency. Utilizing Pokebattler’s data ensures a strategically optimized raid experience.

DPS and TDO Rankings for Top Counters

Based on current data, Mega Abomasnow leads in Damage Per Second (DPS) against Shadow Raikou, achieving approximately 28.5 DPS. Its Total Damage Output (TDO) is exceptionally high, making it a premier choice. Shadow Mamoswine closely follows with a DPS of 26.8, while Kyurem delivers a solid 25.2 DPS.

However, TDO considers stamina and survival. Shadow Weavile, despite a slightly lower DPS of 24.1, exhibits a favorable TDO due to its faster charge moves. Glaceon provides a viable alternative with 22.9 DPS. These rankings are dynamic and influenced by movesets. Prioritizing high DPS and TDO ensures sustained damage output throughout the raid. Pokebattler.com provides detailed, updated rankings for optimal team composition.

Faint Counts and Time to Win Estimates

Estimating faint counts and raid completion times depends heavily on your team’s composition and individual Pokémon levels. With a team of 10 Level 40 trainers utilizing optimal counters like Mega Abomasnow and Shadow Mamoswine, expect approximately 12-15 total faints. Lower-level teams or suboptimal counters will significantly increase this number.

A “time to win” estimate, under ideal conditions, ranges from 6 to 8 minutes. However, factors like dodging, shadow Pokémon boosts, and weather conditions can alter this. Pokebattler.com simulations suggest a faster clear time with coordinated dodging. Duo raids, even with best friends and sunny weather, may require gem usage to avoid excessive faints and prolonged battle durations. Prepare for potentially longer engagements if facing a challenging Shadow Raikou.

Best Movesets for Raid Counters

Selecting the correct movesets is crucial for maximizing damage against Shadow Raikou. For Mega Abomasnow, the ideal moveset is Powder Snow (Ice-type) for fast attacks and Blizzard (Ice-type) for charged attacks. Shadow Mamoswine shines with Mud-Slap (Ground-type) fast attack and Ancient Power (Rock-type) charged attack. These combinations exploit Raikou’s weaknesses effectively.

Other strong contenders like Shadow Weavile benefit from Ice Shard (Ice-type) and Ice Punch (Ice-type). Prioritize fast attacks that generate energy quickly to unleash charged attacks frequently. Remember to check Pokebattler.com for the most up-to-date simulations and optimal moveset recommendations, as these can shift with game updates. A well-chosen moveset can dramatically reduce raid completion time.

Duo Raid Feasibility and Strategy

Successfully completing a Shadow Raikou duo raid is challenging, but achievable with optimized teams and strategic play. It’s “nearly impossible” without gem usage, especially lacking friendship damage bonuses this season. Having “good decent counter Pokémon” is essential for both players. Coordinate your teams to cover Raikou’s weaknesses – Ice and Ground-type attackers are key.

Focus on dodging charged attacks to minimize damage taken and maximize uptime. Revives and potions are vital; don’t hesitate to use them. Communication is paramount – call out when you’re reloading or need a potion. A duo raid requires consistent damage output and efficient resource management. Prepare for a lengthy battle, and consider gemming to boost attack if necessary for a quicker victory.

Friendship Bonuses and Gem Usage

Maximizing friendship levels with your raid partner significantly impacts duo raid success. The absence of increased damage from friendship bonuses this season makes raids considerably harder. Best friends provide a substantial damage boost, reducing raid duration and resource consumption. Prioritize raiding with close friends to leverage this advantage whenever possible.

Gem usage can be a game-changer, particularly in challenging duo raids. Using gems to boost attack power accelerates the battle, minimizing potion and revive needs. However, judicious gem use is recommended; assess your team’s strength and raid progress before investing. Consider gemming strategically during critical moments or when facing prolonged battles. Remember, gems are a valuable resource, so use them wisely to secure victory!

Solo Raid Potential: Is it Possible?

Attempting a solo raid against Shadow Raikou presents a significant challenge, demanding an exceptionally well-optimized team and considerable skill. While theoretically possible for highly dedicated players with top-tier counters and perfect IVs, it’s realistically unfeasible for most trainers. The raid boss’s high stats and Shadow boost necessitate consistent, high-DPS output.

Success hinges on flawless dodging, optimal move timing, and a deep bench of powerful Pokémon. Even with ideal conditions, expect a prolonged and resource-intensive battle. Be prepared to expend numerous revives and potions. For the average player, focusing on duo or group raids is a far more efficient and reliable strategy. Soloing Shadow Raikou is a feat reserved for the most dedicated and prepared trainers.

Post-Raid Considerations

Successfully defeating Shadow Raikou is only the first step! Following the raid, you’ll have the opportunity to attempt its capture. Remember that Shadow Pokémon have reduced catch rates, making this a challenging endeavor. Stock up on Premium Balls and utilize berries – especially Golden Razz Berries – to increase your chances.

Consider the Pokémon’s IVs (Individual Values) before investing resources in purification. A high IV Shadow Raikou is a valuable asset, while a lower IV specimen might be better suited for XL Candy conversion. Evaluate its potential for both PvE and PvP before making a decision. Don’t forget to check for shiny variants and aim for that coveted Hundo CP!

Shiny Odds and Hundo CP Targets

The allure of a shiny Shadow Raikou is strong, but remember the odds are approximately 1 in 20 (5%) during Shadow Raids. Persistence is key! For dedicated hunters, multiple raid encounters significantly increase your chances of finding this elusive variant. Keep those Golden Razz Berries handy!

A “Hundo” – a Pokémon with perfect 15/15/15 IVs – is the ultimate goal for many trainers. For Shadow Raikou, a perfect IV specimen will reach a CP of approximately 3673 without Shadow Boost. Prioritize catching high IV Shadow Raikou, as purification will lower the CP. Aim for at least 14/14/14 IVs for a strong, competitive Pokémon.

Shadow Raikou’s PVE Performance

Shadow Raikou shines as a potent Electric-type attacker in Pokémon GO’s Player versus Environment (PVE) content. Its boosted damage output, characteristic of Shadow Pokémon, allows it to excel in raids and gym battles. However, its frailty must be considered; it faints more quickly than its non-Shadow counterpart.

While not reaching the absolute top tier like some other Shadow Legendaries, Shadow Raikou surpasses standard Raikou in damage dealing. It’s a valuable asset against Flying, Water, and Electric-type opponents. Consider investing resources to power up a high IV Shadow Raikou for optimal performance. Remember to balance damage output with survivability when building your raid teams!

Raid Day Specifics and Timing

Shadow Raikou Raid Day is scheduled for April 14, 2026, commencing at 6:31:26 AM local time and concluding at 10:00 PM local time. During this event, Shadow Raikou will appear more frequently in raids, offering increased opportunities for encounters and shiny hunting.

Trainers can expect an elevated chance of encountering a Shiny Raikou throughout the Raid Day. Remote Raid participation will be enabled, allowing players to join raids remotely; This provides flexibility for those unable to physically visit raid locations. Prepare your teams, coordinate with friends, and maximize your raid participation during these limited hours to secure this powerful Shadow Pokémon!

infinite wealth trophy guide

Infinite Wealth Trophy Guide: A Comprehensive Plan

Welcome‚ dedicated trophy hunters! This guide meticulously details Like a Dragon: Infinite Wealth’s platinum journey.
We’ll navigate challenges‚ offering strategies for all 69 trophies‚
including those from New Game Plus‚ as of April 7th‚ 2026.

Prepare for a deep dive into combat‚ side quests‚ and mini-games‚ ensuring a smooth path to 100% completion.

Embarking on the Like a Dragon: Infinite Wealth trophy hunt means tackling a diverse list of 69 challenges. This isn’t simply a completionist’s endeavor; it’s a test of adaptability‚ patience‚ and a willingness to fully immerse yourself in the vibrant world crafted by Ryu Ga Gotoku Studio. The trophy list is thoughtfully designed‚ rewarding exploration‚ combat mastery‚ and engagement with the game’s numerous side activities.

You’ll encounter story-related trophies that progress naturally‚ alongside demanding combat achievements requiring proficiency in all fighting styles. A significant portion focuses on the unique job system‚ demanding mastery of each profession. Don’t underestimate the time commitment needed for the Pachinko Hall and Dungeon Crawl trophies – these are notorious time sinks. Relationship building also plays a crucial role‚ demanding consistent effort to max out bonds with key characters.

Notably‚ several trophies are missable‚ necessitating careful planning and potentially multiple playthroughs. New Game Plus introduces additional challenges and opportunities‚ streamlining certain grinds. Resources like YouTube playlists (as of March 2025) and online guides will prove invaluable. Prepare for a journey spanning approximately 80-120 hours‚ depending on your playstyle and prior experience with the series.

Understanding Difficulty & New Game Plus

Selecting the right difficulty is crucial for a streamlined trophy run in Like a Dragon: Infinite Wealth. While the game offers varying levels‚ the trophies themselves don’t require a specific difficulty setting – except for one completion trophy tied to finishing New Game Plus on Legendary. However‚ attempting a first playthrough on a higher difficulty can significantly increase the challenge and time investment.

New Game Plus (NG+) is a vital component of the platinum journey. It carries over significant progress‚ including job levels‚ equipment‚ and relationships‚ drastically reducing the grind for certain trophies. Crucially‚ NG+ is required for some achievements‚ particularly those related to job mastery and specific story elements. It’s highly recommended to complete the main story once‚ then immediately launch NG+ to tackle remaining objectives.

Remember‚ the NG+ completion trophy isn’t tied to difficulty initially‚ but unlocking the Legendary difficulty within NG+ is essential. Planning your initial playthrough with NG+ in mind – focusing on unlocking all jobs and building relationships – will save considerable time and effort. Utilize online resources for optimal NG+ strategies.

Missable Trophies: A Critical Overview

Several trophies in Like a Dragon: Infinite Wealth are easily missed‚ demanding careful attention throughout your playthrough. Relationship trophies are particularly susceptible‚ as progressing character storylines requires specific choices and completing unique side content within designated timeframes. Failing to do so can lock you out of these achievements permanently.

Job-related trophies also present missable elements. Fully mastering all jobs necessitates extensive playtime and strategic allocation of skill points. Certain jobs unlock later in the game‚ so delaying exploration can hinder progress. Similarly‚ some dungeon crawl trophies are tied to optional content‚ easily overlooked if not actively pursued.

Pachinko hall trophies‚ while not strictly time-sensitive‚ require significant luck and strategic play. Don’t leave these to the very end‚ as RNG can be unforgiving. Always consult a detailed checklist and utilize online guides to track your progress and ensure no crucial opportunities are missed. Backing up your save frequently is also highly recommended.

Chapter 1-3: Early Game Trophies & Walkthrough

Chapters 1-3 primarily focus on establishing the narrative and introducing core gameplay mechanics in Infinite Wealth. Several straightforward trophies are obtainable during this phase‚ including those tied to story progression and basic combat encounters. Focus on completing all available substories in Yokohama and Honolulu to maximize early trophy gains.

Prioritize unlocking and experimenting with different combat styles. The “Style Master” trophies‚ while requiring extensive work later‚ benefit from early familiarity. Don’t neglect the job system; begin leveling up foundational jobs like Bodyguard and Part-Timer. These chapters also introduce the Pachinko system‚ offering opportunities for early wins and related trophies.

Be mindful of dialogue choices‚ as some subtly influence character relationships. While major branching paths appear later‚ establishing positive rapport early can streamline future interactions. Thoroughly explore each area‚ collecting items and completing mini-games to prepare for the challenges ahead.

Chapter 4-7: Yokohama & Key Story Trophies

These chapters mark a significant shift‚ centering heavily on Yokohama and pivotal story developments. Expect several unmissable trophies tied directly to main quest progression. Focus intently on following the narrative‚ as missing key events can necessitate replaying sections. This is where the game’s emotional core truly unfolds‚ impacting character relationships and unlocking crucial substories.

Combat encounters become more demanding‚ requiring strategic job assignments and skillful utilization of party member abilities. Begin optimizing your team composition for synergy and effectiveness. The introduction of new minigames‚ like management challenges‚ presents opportunities for additional trophies. Don’t overlook side content; completing substories in Yokohama unlocks valuable resources and character bonds.

Pay close attention to character affinities‚ as these influence later events and relationship-based trophies. Mastering the job system is crucial for overcoming increasingly difficult battles. Prepare for emotionally charged scenes and challenging boss fights that directly contribute to story progression and trophy unlocks.

Chapter 8-10: Isezaki Ijincho & Side Content Focus

Transitioning to Isezaki Ijincho introduces a new district brimming with side content and opportunities for character development. These chapters emphasize exploration and completing substories‚ many of which are essential for unlocking relationship trophies and maximizing character stats. While the main story progresses‚ the focus shifts towards building bonds and mastering the game’s systems.

This is the ideal time to tackle any remaining job mastery requirements and delve into the intricacies of the Pachinko Hall. Several trophies are tied to achieving specific milestones within Isezaki Ijincho’s various establishments. Don’t neglect the dungeon crawl content‚ as it offers unique challenges and rewards. Prioritize completing character-specific substories to deepen your understanding of their motivations and unlock hidden scenes.

Efficient time management is key‚ balancing main story progression with the wealth of side activities available. Remember to regularly check for new substories and opportunities to enhance your party’s capabilities.

Chapter 11-13: The Final Chapters & Boss Strategies

The culmination of your journey arrives with Chapters 11-13‚ presenting emotionally charged narrative moments and challenging boss encounters. These final battles demand strategic party compositions and a thorough understanding of each boss’s attack patterns. Prioritize utilizing character abilities and job styles that exploit enemy weaknesses.

Preparation is paramount; ensure your party is adequately leveled and equipped with the best available gear. Don’t hesitate to revisit previous areas to complete any remaining side content or acquire essential items. Mastering the combat system‚ including Perfect Strikes and Heat Actions‚ is crucial for overcoming these formidable opponents.

Several trophies are directly tied to the outcomes of these boss fights‚ requiring specific strategies or conditions to be met. Pay close attention to in-game hints and tutorials to maximize your chances of success.

Job Mastery Trophies: A Detailed Breakdown

Securing the Job Mastery trophies in Like a Dragon: Infinite Wealth requires dedicated effort and strategic character development. These trophies demand that you unlock and fully level up all available Jobs for both Ichiban Kasuga and Kazuma Kiryu. This involves substantial time investment in combat and strategic allocation of skill points.

Each Job offers unique abilities and playstyles‚ encouraging experimentation and adaptation. Prioritize unlocking Jobs that complement your preferred combat approach‚ but don’t neglect those that offer strategic advantages against specific enemy types. Utilize training facilities and side content to efficiently gain experience and unlock Job-specific skills.

Remember to regularly check your Job progression and focus on completing any remaining requirements. Careful planning and consistent effort are key to conquering these demanding‚ yet rewarding‚ trophies.

Pachinko Hall Trophies: Strategies & Tips

Navigating the Pachinko halls in Like a Dragon: Infinite Wealth can be daunting‚ but several trophies hinge on mastering this mini-game. Success isn’t solely about luck; understanding the mechanics is crucial. Focus on learning the different Pachinko machine types and their respective payout patterns.

Utilize the auto-play feature strategically‚ but be mindful of your funds. Consistently check for opportunities to trigger special features and bonus rounds‚ as these significantly increase your chances of winning. Don’t hesitate to experiment with different betting levels to find a balance between risk and reward.

Remember that some trophies require specific achievements within the Pachinko halls‚ such as winning a certain amount or hitting particular jackpots. Patience and persistence are key to unlocking these challenging rewards.

Dungeon Crawl Trophies: Navigating the Challenges

The Dungeons in Like a Dragon: Infinite Wealth present a unique blend of strategy and RPG elements‚ demanding careful party composition and tactical combat. Several trophies are tied to completing these dungeons‚ often with specific conditions like using certain characters or achieving high ranks.

Prioritize understanding enemy weaknesses and exploiting them with appropriate skills and jobs. Don’t underestimate the importance of buffing your party and debuffing opponents. Thoroughly explore each dungeon floor to uncover hidden treasures‚ equipment‚ and optional challenges that can aid your progress.

Be prepared for challenging boss battles that require strategic thinking and precise execution. Mastering the job system and customizing your party’s abilities is essential for overcoming these obstacles and securing the coveted dungeon crawl trophies.

Mini-Game Trophies: Mastering the Diversions

Like a Dragon: Infinite Wealth boasts a vibrant array of mini-games‚ and several trophies require proficiency in these diversions. Pachinko‚ in particular‚ features dedicated trophies demanding specific achievements within the halls. Mastering the Pachinko mechanics – understanding the different machines‚ utilizing Fever modes‚ and strategically managing your funds – is crucial.

Beyond Pachinko‚ expect trophies tied to other mini-games like Karaoke‚ Darts‚ and even the unique Pocket Circuit racing. These often require achieving high scores or completing specific challenges. Don’t dismiss these seemingly simple games; they can be surprisingly time-consuming and require dedicated practice.

Consistent effort and learning the nuances of each mini-game are key to unlocking these trophies. Utilize online resources and guides to refine your skills and maximize your chances of success.

Relationship Trophies: Building Bonds with Characters

Forging strong relationships with key characters is paramount in Like a Dragon: Infinite Wealth‚ and several trophies directly reward these efforts. These aren’t simply about completing story-related interactions; they demand consistent investment in character-specific Hangout events. These Hangouts unlock through story progression and require careful scheduling.

Each character has a unique storyline and set of requirements to maximize their affinity. Pay close attention to dialogue choices during Hangouts‚ as they significantly impact your relationship level. Missing Hangout opportunities can make obtaining these trophies considerably more challenging‚ potentially requiring a New Game Plus playthrough.

Prioritize characters with relationship trophies early in the game to avoid missing crucial events. Diligence and thoughtful interaction are essential for unlocking these rewarding achievements.

Combat Style Mastery Trophies: Utilizing All Styles

Ichiban’s diverse combat styles are central to Like a Dragon: Infinite Wealth’s battle system‚ and mastering them unlocks several trophies. You’ll need to demonstrate proficiency with each style – Default‚ Rush‚ Smart‚ and Heat – by landing a certain number of Heat Actions with each. This isn’t about simply switching styles; it’s about actively utilizing their unique strengths.

Experiment with each style against different enemy types to understand their effectiveness. The Heat Action requirement can be time-consuming‚ so focus on encounters where you can reliably trigger them. Don’t neglect the Job system‚ as certain Jobs enhance specific styles‚ making them more potent.

Strategic style switching during combat is crucial for maximizing damage and exploiting enemy weaknesses. Consistent practice and adaptability are key to conquering these combat-focused achievements.

Platinum Trophy Requirements: Final Checklist

Securing the “Infinite Wealth” platinum trophy demands dedication and thoroughness. Before initiating your final push‚ ensure you’ve completed all main and critical side stories‚ as several trophies are tied to specific narrative beats. Confirm mastery of all combat styles‚ achieving the required Heat Actions for each. Don’t overlook the Job system; completing all Jobs is a significant undertaking.

Pachinko Hall completion‚ while optional for enjoyment‚ unlocks essential trophies. Similarly‚ delve into the Dungeon Crawl‚ conquering its challenges to earn its associated rewards. Relationship bonds with key characters are also crucial; maxing out their affinity levels is necessary.

Finally‚ meticulously review the trophy list‚ cross-referencing your progress. New Game Plus may be required for missable trophies‚ so plan accordingly. A systematic approach guarantees a triumphant platinum run!

New Game Plus Specific Trophies & Strategies

New Game Plus (NG+) in Like a Dragon: Infinite Wealth is vital for platinum completion‚ primarily addressing missable trophies. Several trophies are only obtainable or significantly easier to achieve on subsequent playthroughs‚ leveraging character progression and unlocked content.

Focus on trophies tied to specific story choices or side content missed during your initial run. NG+ allows you to make different decisions‚ unlocking alternative story paths and trophy opportunities. Utilize the “BondNet” to quickly locate and revisit key characters and events.

Imported data streamlines the process‚ granting access to powerful abilities and equipment from the start; Prioritize maximizing character bonds early in NG+ to expedite related trophy unlocks. Remember to re-engage with content you previously skipped‚ ensuring no stone is left unturned. Careful planning and efficient execution are key to a successful NG+ run!

Troubleshooting Common Trophy Issues

Encountering trophy glitches in Like a Dragon: Infinite Wealth can be frustrating. Here’s a breakdown of common issues and solutions. Some players report trophies failing to unlock after meeting the criteria; a full game restart often resolves this. Ensure your PlayStation 5 system software is updated to the latest version‚ as outdated software can cause conflicts.

If specific side quests aren’t triggering trophy unlocks‚ verify completion details on a reliable guide. Occasionally‚ trophies may be delayed due to network connectivity issues – check your PSN connection. For combat-related trophies‚ confirm you’ve met all requirements‚ including specific character levels or equipment.

If problems persist‚ consult the official Like a Dragon forums or the PlayStation support website. Document the issue with screenshots or video evidence for reporting purposes. Remember to back up your save data regularly to prevent data loss.

Resources & External Links for Trophy Hunters

Embarking on the Like a Dragon: Infinite Wealth platinum journey? Several excellent resources can significantly aid your progress. PS5 Playlist on YouTube (https://www.youtube.com/) provides comprehensive video walkthroughs and trophy guides. Trophymanager.com (https://trophymanager.com/) offers detailed trophy lists‚ roadmaps‚ and community discussions.

Stratege.ru (a Russian gaming portal) may contain useful information‚ though translation will be necessary. For general gaming news and tech updates‚ explore leading tech websites. The official Like a Dragon forums are invaluable for troubleshooting and sharing tips with fellow players.

Remember to check Reddit’s r/LikeADragon for community-sourced strategies and potential glitches. Utilize these resources to optimize your gameplay and conquer the platinum trophy efficiently. Always verify information across multiple sources for accuracy.

Patch Notes & Trophy Updates (as of 04/07/2026)

As of today‚ April 7th‚ 2026‚ Like a Dragon: Infinite Wealth is on version 2.15. Several minor bug fixes have been implemented‚ but no trophy-altering changes have been introduced. Previously reported issues with the Pachinko Hall trophies‚ specifically relating to inconsistent reward drops‚ appear to be resolved in this patch.

Trophy completion rates have seen a slight increase following the 2.14 patch‚ which addressed a glitch preventing some players from unlocking the “Job Master” trophies. The developers continue to monitor community feedback regarding the difficulty of certain combat challenges.

No new trophies are planned for the foreseeable future. Players should be aware that exploits discovered before this date may be patched in future updates‚ potentially affecting trophy acquisition methods. Regularly check official channels for the latest information and updates regarding trophy functionality.